Windows: How to create a free captive portal

In this article, we will show you how you can easily create a wireless hotspot with a login page in Windows. You don’t need anything special except a Wi-Fi enabled PC or laptop and a wired or wireless Internet connection!
There are two free programs that need to be installed on your computer, but the setup does not require any special networking knowledge. The guide below is for Windows Vista, 7 and 8 only.
Installing a hotspot on your computer
This first step is necessary to turn your computer into a wireless access point that other computers on the network can connect to. It essentially takes the place of a hardware access point, which means you don’t need to use any additional hardware.
- Download Wi-Fi Creator, then install it.
- Launch Wi-Fi Creator and make sure that Automatic configuration is selected, leave the default settings for now or give the hotspot a new name and a new password of 8 characters or more. Then select the network adapter that connects to the Internet from the drop-down list, it can be a wireless or wired adapter.

- 3. Click on « Set up and Start Hotspot ». A new virtual network adapter will be created using the Microsoft Virtual WiFi Miniport adapter and the adapter that connects to the Internet will now be configured to share the Internet with the new connection.
If you don’t want to set up a login page, you can stop here and give users the network key entered in WiFi Creator, although that defeats the purpose of this article. Note that WiFi Creator uses WiFi WPA2-PSK encryption which some older wireless adapters may not work with.
Setting up a captive portal
Setting up an additional login page requires software to sit between the adapter acting as an access point and the adapter accessing the Internet to intercept web traffic and redirect it to the login page before allowing access.
There are very few free Windows applications that can do this without the need for external access points or additional hardware. Here are a few:
How to create a captive portal in Windows with ARPMiner ?
The beauty of ARPMiner is that it is very easy to configure and offers enough options to set up a simple login page. There are more advanced options, such as RADIUS accounting, but they are only available in the paid versions that start at 220 euros.
1. Download ARPMiner and install it. After installation, launch ARPMiner making sure that the Wi-Fi Creator hotspot is already running. You need to make sure that TekpSpot.exe is allowed in your firewall from the ARPMiner Program Files folder which is the proxy/DNS service used. Or to test, temporarily disable your firewall.
2. Go to the Users tab and create a new hotspot user. In the boxes at the bottom, enter a name, a password and the session duration in seconds. Although the user will be logged out once the time is up, they can simply log back in, and so the timer won’t block expired users. Press Add/Update to add the user to the system.

3. Click on the Settings tab and then click on NAT underneath. This sets up the Internet connection sharing that was done by Wi-Fi Creator earlier, but if ARPMiner tries to set things up differently, it won’t work.

Make sure that the adapter that connects directly to the Internet is set as the public network and the Virtual WiFi Miniport adapter created by the hotspot program is the private network. Click Save, then click the Start button icon to start the ARPMiner service.
4. Now go to a computer you want to connect to the network and look for the hotspot you created earlier, then connect to it, the default SSID is « MyHotspot » and the default pass is « 12345678 ». Of course, you can connect to the hotspot from other internet-enabled devices, such as smartphones and tablets.

5. Now open a web page in a web browser and you should be redirected to the ARPMiner login page, where you can enter the credentials created in the Users tab in step 2.

6. After pressing Login, you will be redirected to the session information page which will show the length of the session and the date it was created. You can now browse the web until the time is up, after which you will be asked to log in again.
How to create a captive portal with Microsolut on Windows ?
Microsolut has a wide range of features and includes a full hotspot billing system if you want to go that route. A major drawback is that the free version only allows 2 simultaneous users online, which can be a problem if you plan to have your hotspot system support multiple users browsing at the same time.
1. Download Microsolut and install using the default options, this will take some time. Make sure your WiFi Creator hotspot is up and running.
2. Launch the program and when the login window appears, simply press Login. The username and password for the server can be re-configured later.
3. Click Setup -> Web server in the left menu and in the IP Address drop-down menu of the Web server tab, select the address « 192.168.137.1 » and click Save.

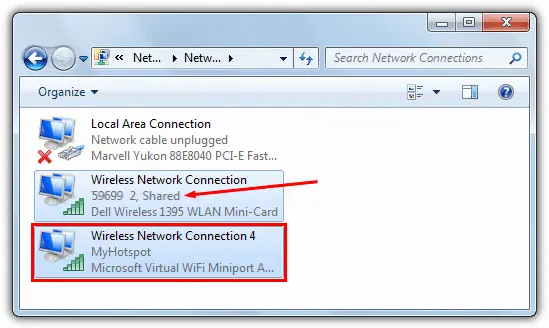
4. Go to Connections -> Monitor and in the Adapter Name drop-down menu, select the adapter that was created by the WiFi Creator hotspot software. In our case it is « Wireless Network Connection 4 », you can check the name in the Network and Sharing Center. Click on Save.

5. To quickly test your hotspot, click on Start Hotspot and if a firewall popup appears, click to allow it. Go to General -> Accounts, a TEST user is already set up that users on your network can access freely for 5 minutes for a quick test.
However, the options for the TEST user are outdated and need to be changed. Click on TEST and then on Modify, then enter a positive number in the « Expire in » box. Uncheck the Print Ticket box and click Save.
6. Using a device that needs to connect to the hotspot, find the WiFi connection as in step 4 of ARPMiner. Open a web page in the web browser and you should be greeted by the login page that is set to accept the TEST user, check the box to accept the terms and click Go. A welcome window will show the account limits, then you are ready to browse for about 5 minutes before the account expires.

Unlike ARPMiner, this 5 minute usage is controlled by the MAC address and you cannot get another 5 minutes until the MAC is cleared from the test access settings window.
How to create a captive portal in Windows with MyHotSpot ?
MyHotSpot is from the same developer as WiFi Creator that we use to create the virtual hotspot, and is perhaps the most complicated to configure as it is squarely intended to be used as a full-fledged payment system. But with time and patience, it’s also a very powerful and efficient program, and best of all, its freeware!
1. Download MyHotSpot and install it, a reboot is required. Make sure your WiFi hotspot is working after the reboot.
2. Run the program and in the network configuration window, make sure Automatic is selected and choose the adapter that connects to the Internet from the drop-down menu at the top and the hotspot below it. Click on Next.
3. Enter a city and country in the next window and, when prompted to enter a username and password, simply click Login.
4. Here we will activate a simple connection test to check that the connection is working. Click on the menu Edit -> Hotspot Configuration -> Access, then click on the blue advanced setting button. Check « Enable guest-login », adding a password is optional, click Close.

5. As with the previous hotspot software, you now need to go to a device that can connect to the hotspot, such as another computer or tablet, log in (remember the default is « MyHotspot » and « 12345678 »), and then try to open a web page. You should be greeted by the default MyHotspot login page…

6. Simply type in the username « guest » and a password if you have entered one and click to log in. If you have set things up correctly, a success window will appear.

More advanced settings allow you to adjust access rights, as well as options to edit and design the login page, set up free access URLs that appear to the right of the login window, whitelist MAC addresses to bypass login and SMS authentication.
Unfortunately, MyHotSpot is set up to work with rates and payments, which is fine if that’s what you want, but more problematic if you just want to use access logins for time or bandwidth usage. What you need to do is go to Edit -> « Tariffs and Security » and set all tariff options to zero money, then create a user from there. Once set correctly, the system works quite well.
Also check out :
Share this content:


hi can you help me , it does not work with my wifi and wifi creator
Please describe your problem in detail so that we can help you.