Screenshots are an incredibly useful feature that allows us to capture a snapshot of our screen at any time. However, manually saving each screenshot to a designated folder can be a tedious task, especially if you take many screenshots. Fortunately, Windows 11 offers a simple way to change the location where screenshots are saved by default.
Basic steps to change the default location for saving screenshots in Windows 11
Step 1: Open File Explorer
To begin, launch File Explorer. You can do this by pressing the Windows key + E on your keyboard or by clicking the File Explorer icon in the taskbar.

Step 2: Go to the Screenshots folder
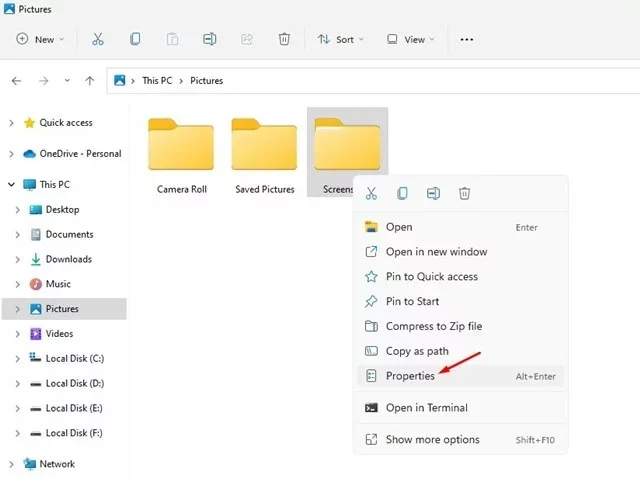
Once you have opened File Explorer, access the Pictures folder by selecting it on the home page or the navigation pane on the left. In the Pictures folder, you will find the Screenshots folder.
Step 3: Open the Screenshots folder properties
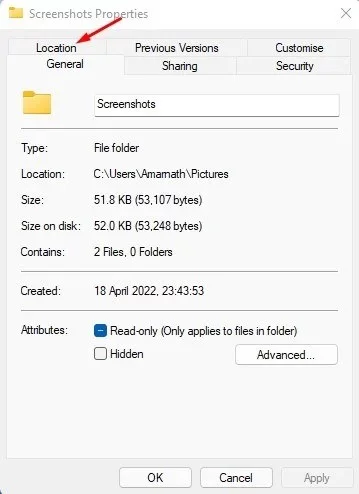
Right-click on the Screenshots folder and select Properties from the context menu. This will open the Screenshot Properties window.


Step 4: Navigate to the Location tab
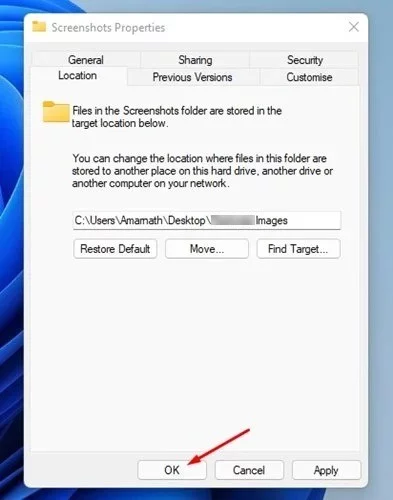
In the Screenshot Properties window, navigate to the Location tab. This tab displays the current location of the Screenshots folder.
Step 5: Click the Move button
To change the default location of the screenshots, click the Move button. This will open the Select Destination window.
Step 6: Choose a new location for the Screenshots folder
In the Select Destination window, choose a new location for the Screenshots folder. This can be any folder on your PC or an external hard drive. Once you have selected a new location, click the Select Folder button.


Step 7: Apply and save changes
Click the Apply button to save the changes. Windows will ask you to confirm if you want to move all the files from the old location to the new location. If you want to move the files, click the Yes button. If you do not wish to move the files, click the No button. Once you have made your selection, click the OK button to save the changes.
That’s it! You have successfully changed the default location for saving screenshots in Windows 11. From now on, all your screenshots will be saved in the new location you selected. In the meantime, if you ever want to change it, just follow the steps above and select the original location.
See also :
