Moving Valorant to an SSD is a crucial step in improving load times and optimising game performance. In this step-by-step guide, we’ll explain how to move Valorant to your SSD in simple steps, ensuring a smooth transition and a smoother gaming experience.
Steps to move Valorant to an SSD
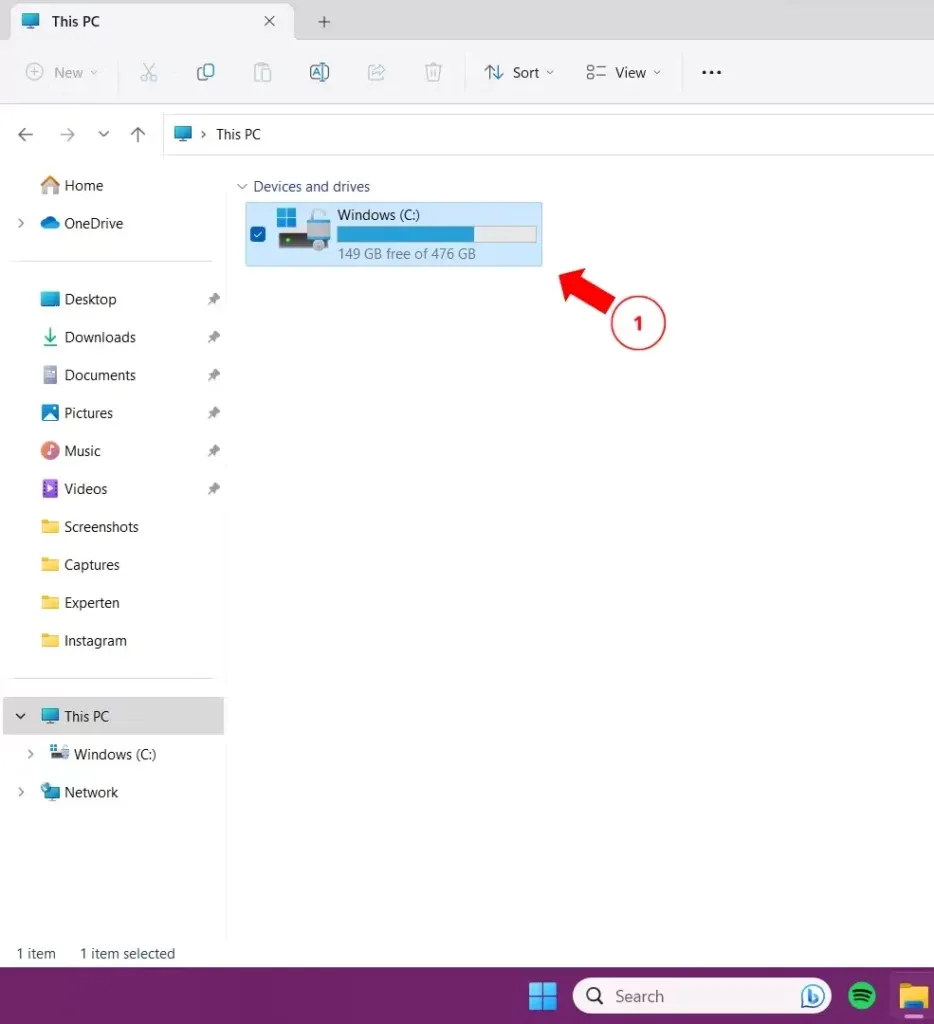
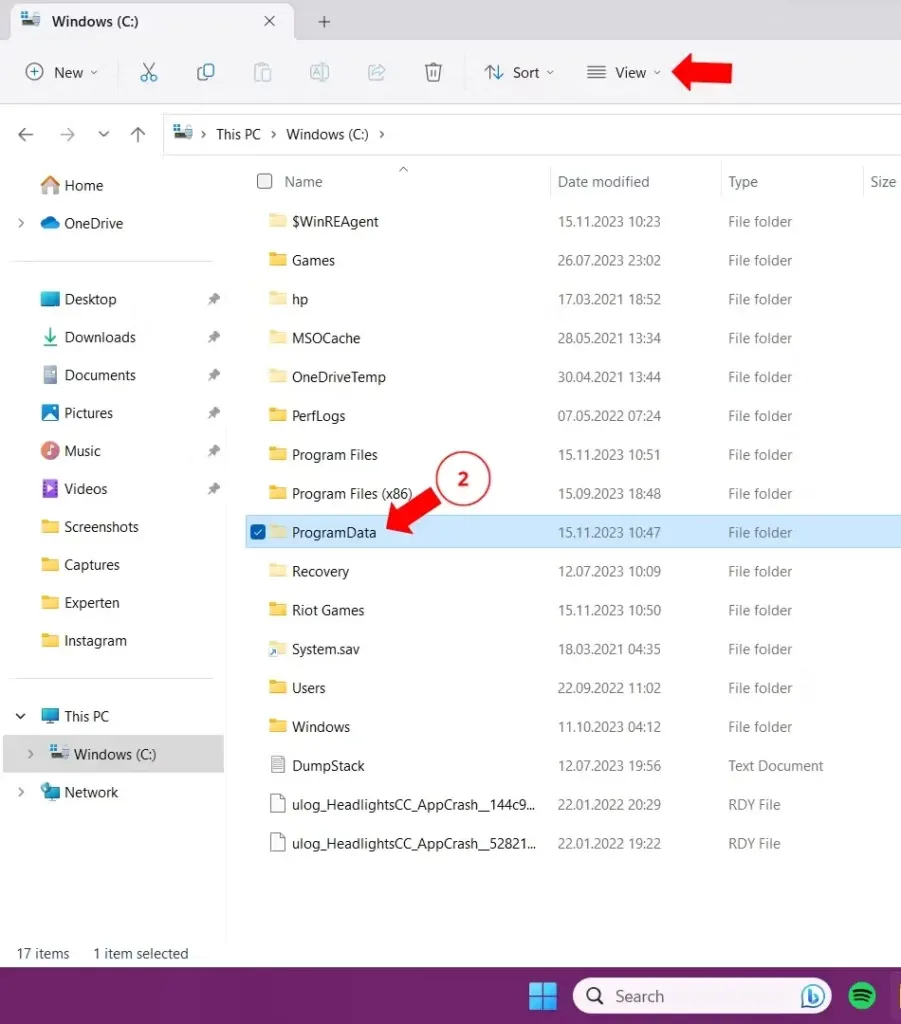
Step 1: Copy the Riot Client to your SSD
- Locate the Valorant installation folder on your current hard drive.
- Click on the folder, copy it, then open the This PC tab and navigate to your SSD.
- Paste the Valorant folder into the desired location on your SSD.


Step 2: Editing the Configuration Files
- Open the program data folder on your SSD (uncheck Hide to see this folder).
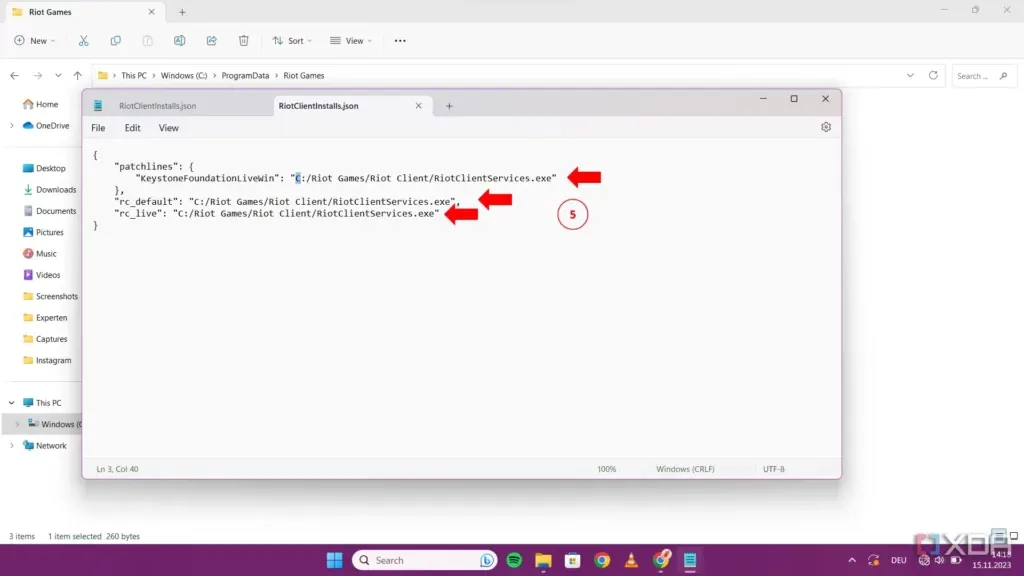
- Go to the Riot Games folder and open the RiotClientInstalls.json file with Notepad.
- Replace the KeystoneLocationLiveWin, rc_default, and rc_live paths with the new SSD paths.
- Save the changes (Ctrl + S) and close the file.
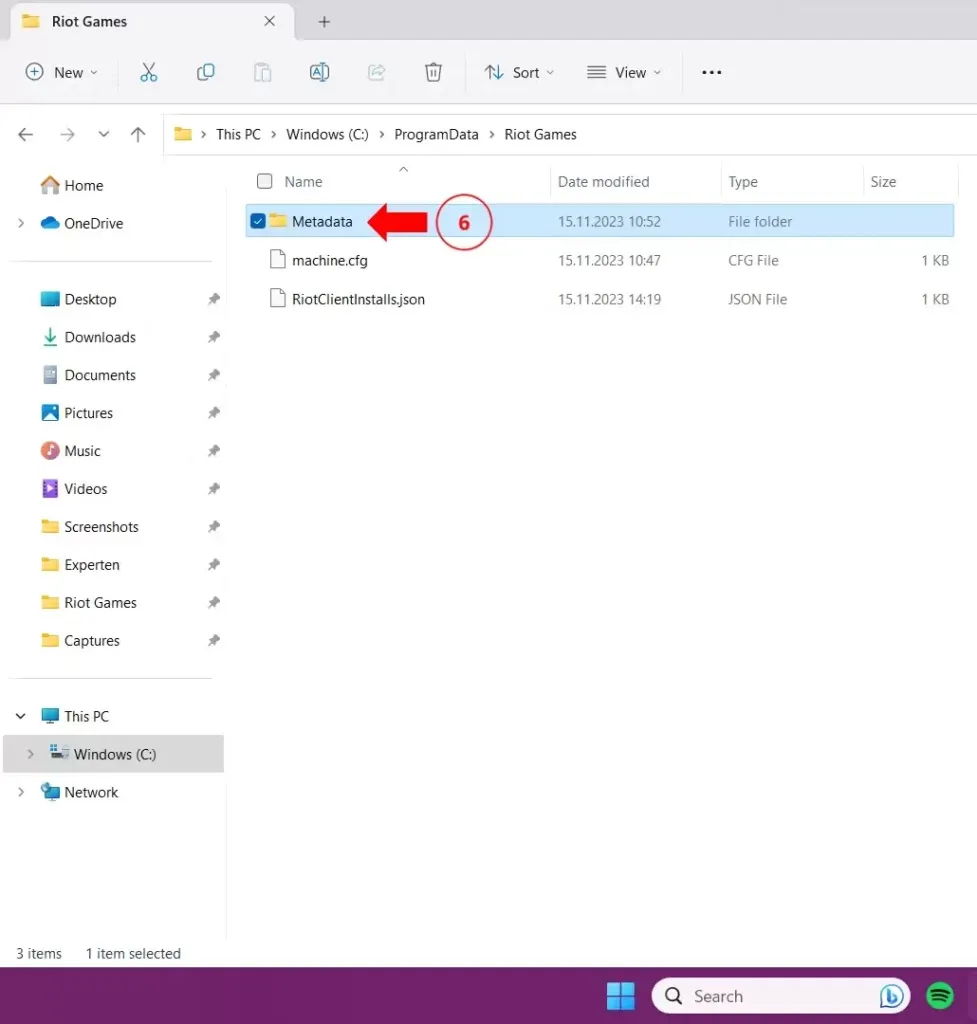
Step 3: Set Game Settings
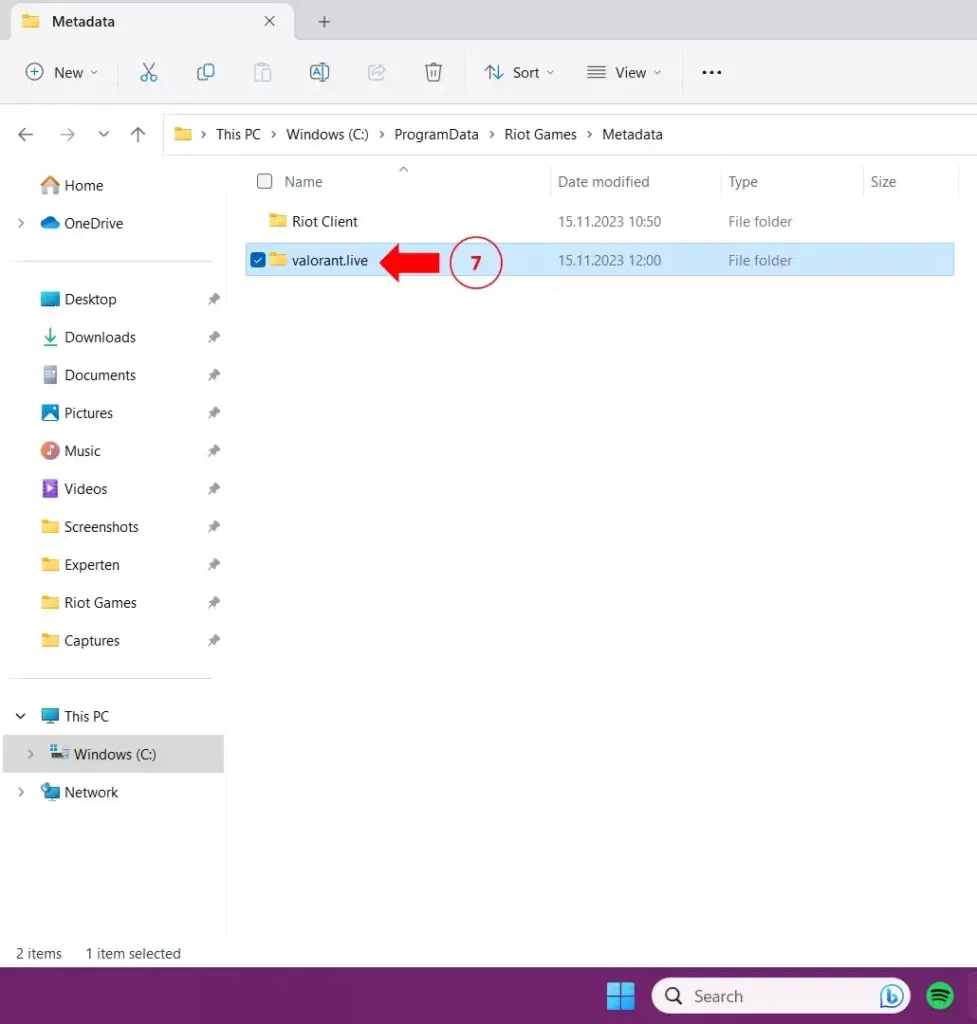
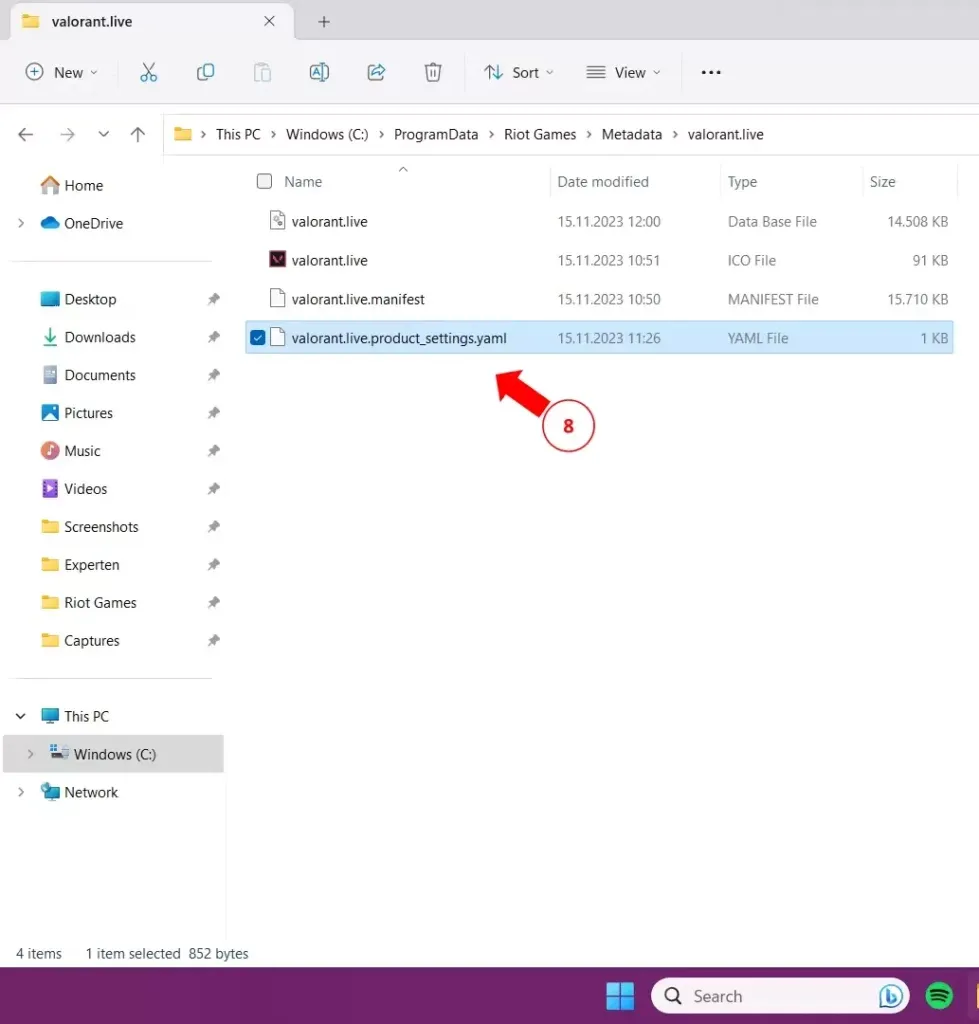
- In the Riot Games folder, open the Metadata folder and navigate to valorant.live.
- Open the valorant.live.product_settings.yaml file with Notepad.
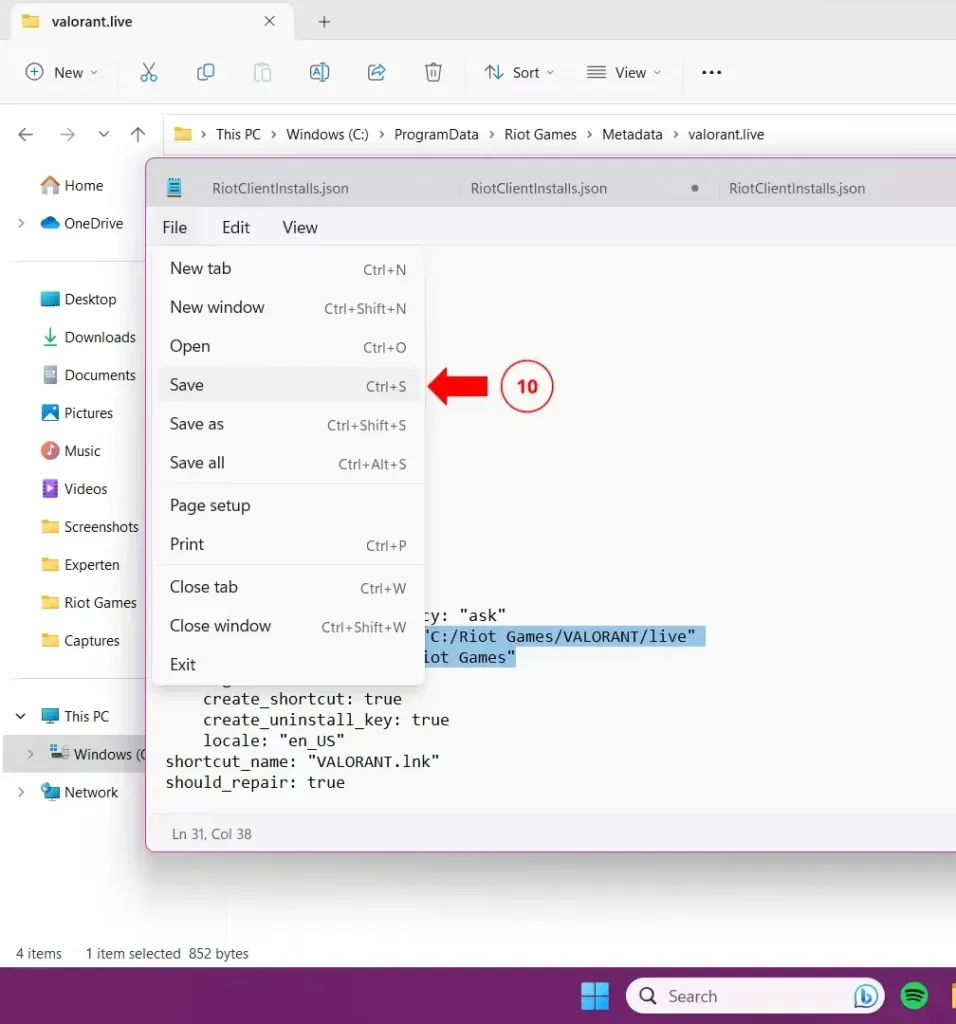
- Change the product_install_full_path and product_install_root paths to the new SSD paths.
- Save and close the file.

Step 4: Play Valorant from your SSD
After following these steps, launch the Valorant client from your SSD.
Check that the game is running correctly and take advantage of the fast loading times offered by your SSD.
By moving Valorant to your SSD, you’ve optimised game performance and reduced loading times. Follow these simple steps for a smooth transition to faster storage. Take full advantage of the smooth gaming experience your SSD has to offer.
